|
Home Register Portal Features Contact Help Articles |
|
|
SchedCheck DocsIntroductionIn this document section, we will try and give you the most accurate descriptions and illustrations to help you navigate through SchedCheck. Text, and information will normally be displayed on the left, and illustrations or diagrams will be displayed on the left. Find the section you are looking for in the side navigation or change the display mode by toggling the switch at the top of the navigation. If you are unable to find the information you are looking for, please feel free to visit the Contact Page and send us an email. This section is still under construction. Please be patient as we continue to add information. Manage Account
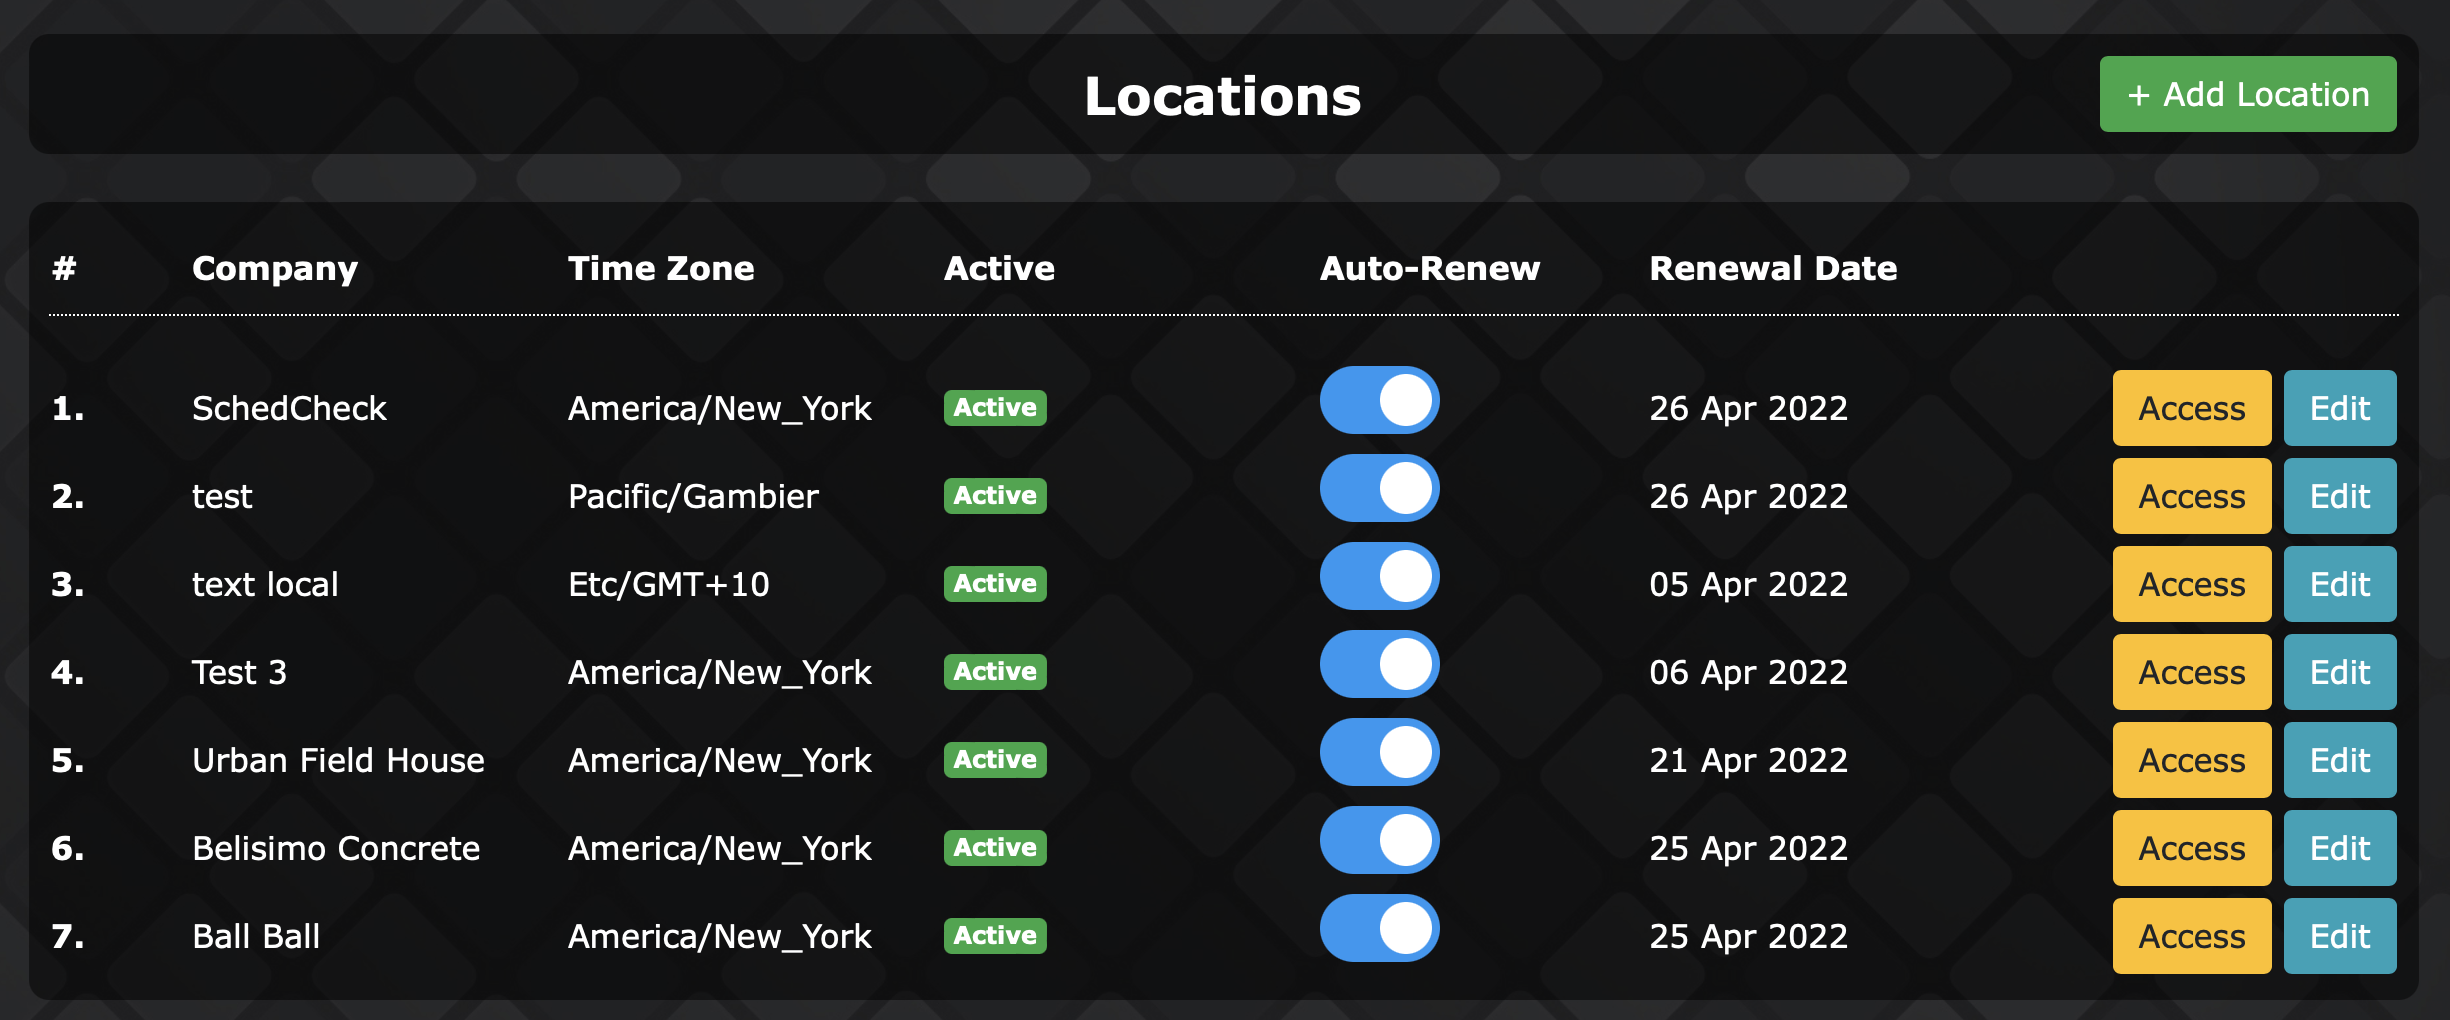
Adding A New BusinessIf you are interested in adding a new business to SchedCheck, you can click the green “+ Add Location” button located in the top right section of this window. A modal will appear asking you for the new information for the business. All subscriptions are based off of the business creation date.
Auto-RenewTurn this toggle button on or off in order to stop a subscription from renewing, or to renew a subscription.
If at any point you need to return to this page, you can simply click the “Gears” icon in the side navigation menu. DashboardMuch like the Manage Accounts page, the dashboard is split in to two sections. The top section is a small weekly calendar to quickly see your upcoming schedule. The top section is a small weekly calendar to quickly see your upcoming schedule. If you click on a shift, and depending on your permissions, you will be brought to either the My Shifts page, or the schedules page. The bottom section is your Company Message Board. Here you and all of your employees can relay companywide announcements, notifications, and communication. Each message will display individual profile pictures, names, and the time/date of their message. Your AccountIn this section of SchedCheck you can update all your personal information. Upload a profile photo that can be seen when communicating with your peers, or when a manager visits your profile. You can add your address for payroll purposes, your birth date, phone number, and set your email preferences. If you are the owner of the SchedCheck main account, you can also change your payment information here. InboxThe inbox is a simple PM system that we included to help avoid needing a third-party system. It works very similar to an email system, but it bundled neatly to help give you an “all-in-one” experience.
The button furthest to the left is the "Mark As Read/Un-Read" button. Create New MessageWhen creating a new message you will be asked to choose a Subject, who you will be sending the message to, and for the message itself. When choosing the recipient of your message you can choose to send it to as many people as you would like, or you can use the dropdown in the top right of the screen to send a message to all employees who are of a certain role within the company. When you are done, press "Send" and your message will be delivered. All recipients will recive an email notification if this setting has been chosen in thier Account Settings. Sent MessageThe sent folder can be accessed via the side navigation. Here you will be able to see any message that were sent by you. Your only two options are to read the message, or to delete them. TrashMuch like the other folders in your inbox, the trash folder can be located by using the side navigation. In the trash folder you can delete a message forever or un-delete a message. List AllView a full list of your employees in alphabetical order. By default you will not be able to see employees who have been terminated from your employment. To change this, check the box below the search labeled "Show Terminated". You can search for specific employees by typing their name in to the search box, or you can re-order your list by using the dropdown in the top right. Each employee row shows you a few pieces of information. You can see their first and last name, their assigned rating, and their employment/account status. The assigned rating is a letter used to help OneClick decide how often an employee should be chosen in the auto-scheduling process. Lastly there is a marquee button at the far right which will give you the option to view the employees profile, or terminate the employee. Viewing an employees profile will allow you to edit most of their information. When you are done simply press "Save". Send InviteThis window can pop up anywhere on SchedCheck when you need to invite a new employee to join you. Simply click "Send Invite" and you will see the demonstrated window. 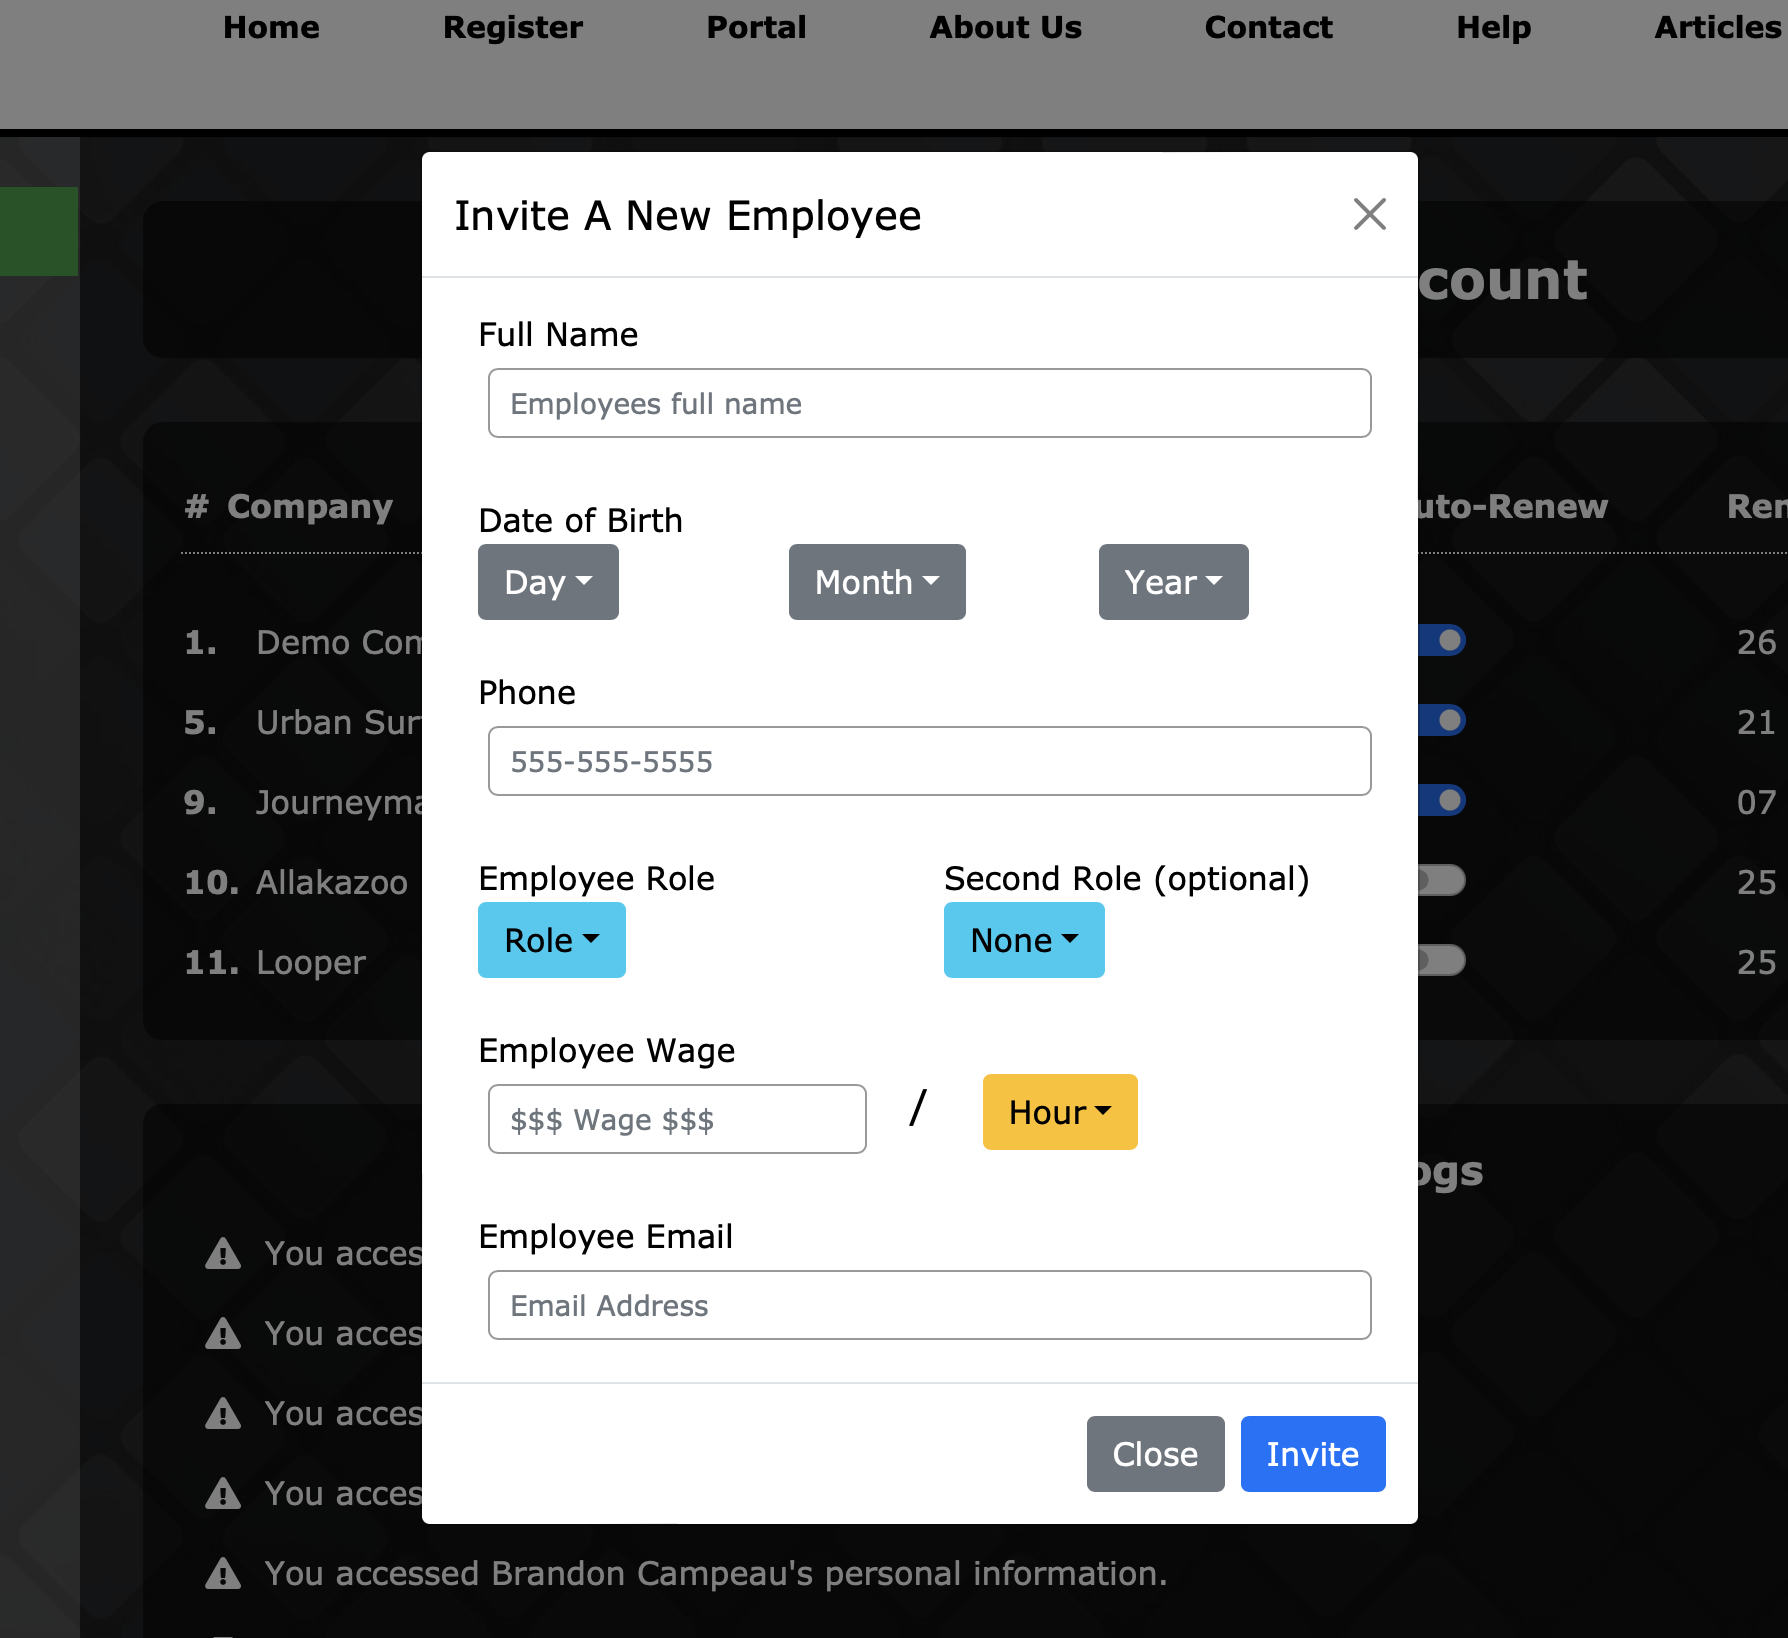
Fill out the form as instructed and when you have all the information filled out, finally click the blue "Invite" in the bottom right of the window. Your employee should recieve an email to register with us shortly after. Pending InvitationsAnytime you send out an invitation it will appear on this page until it is either accepted, or canceled. You can see each employees name, and email ordered in to a list. From this screen you can click the marquee icon and find your options for each invitation. You can cancel, or resend the invite from this menu. Employee RolesAdding and editing Employee Roles can look complicated, but we promise its very easy. Adding an Employee Role is the first step you should take when you get in to SchedCheck. An Employee Roles is just a position you hold in your company. For Example: Servers, Bartenders, Security etc. At the very bottom of the page we have a legend with a Key, Title, and Description of permission you can assign to your Employee Roles. The blue "+ New Role" button at the top right corner will open a window to help you create a new role. Fill out the required information and check off any permissions you would like to assign to the new Role. Editing and deleting roles is just as easy. Simply click the orange edit icon to bring up an edit window or click the red minus icon to delete that Role. When deleting a Role you will be asked to select a different Role to replace the current one just to avoid any accidents. AvailabilityThere are two parts to our Availability Module. There are things you will see as an Employer, and things you will see as an Employee. The calendar you see when you first open this page is your availabilty. At the the top you will see two turqoise buttons, one to show the the calendar view and the other to see your availability in a list view. There is also a small legend at the bottom that shows what colors there are and what thier meaning is. As an Employer you will have a dropdown menu in the top right of the screen. By default is says "My Availability", but when you open the list you are able to take a look at any employees availabilty. You cannot add or edit thier availability for them. Also there will be a red bar shown like below if you have the Approve/Deny Availability settings turned on and there are employees with open requests. Also these notifications will show up in your navigation menu. 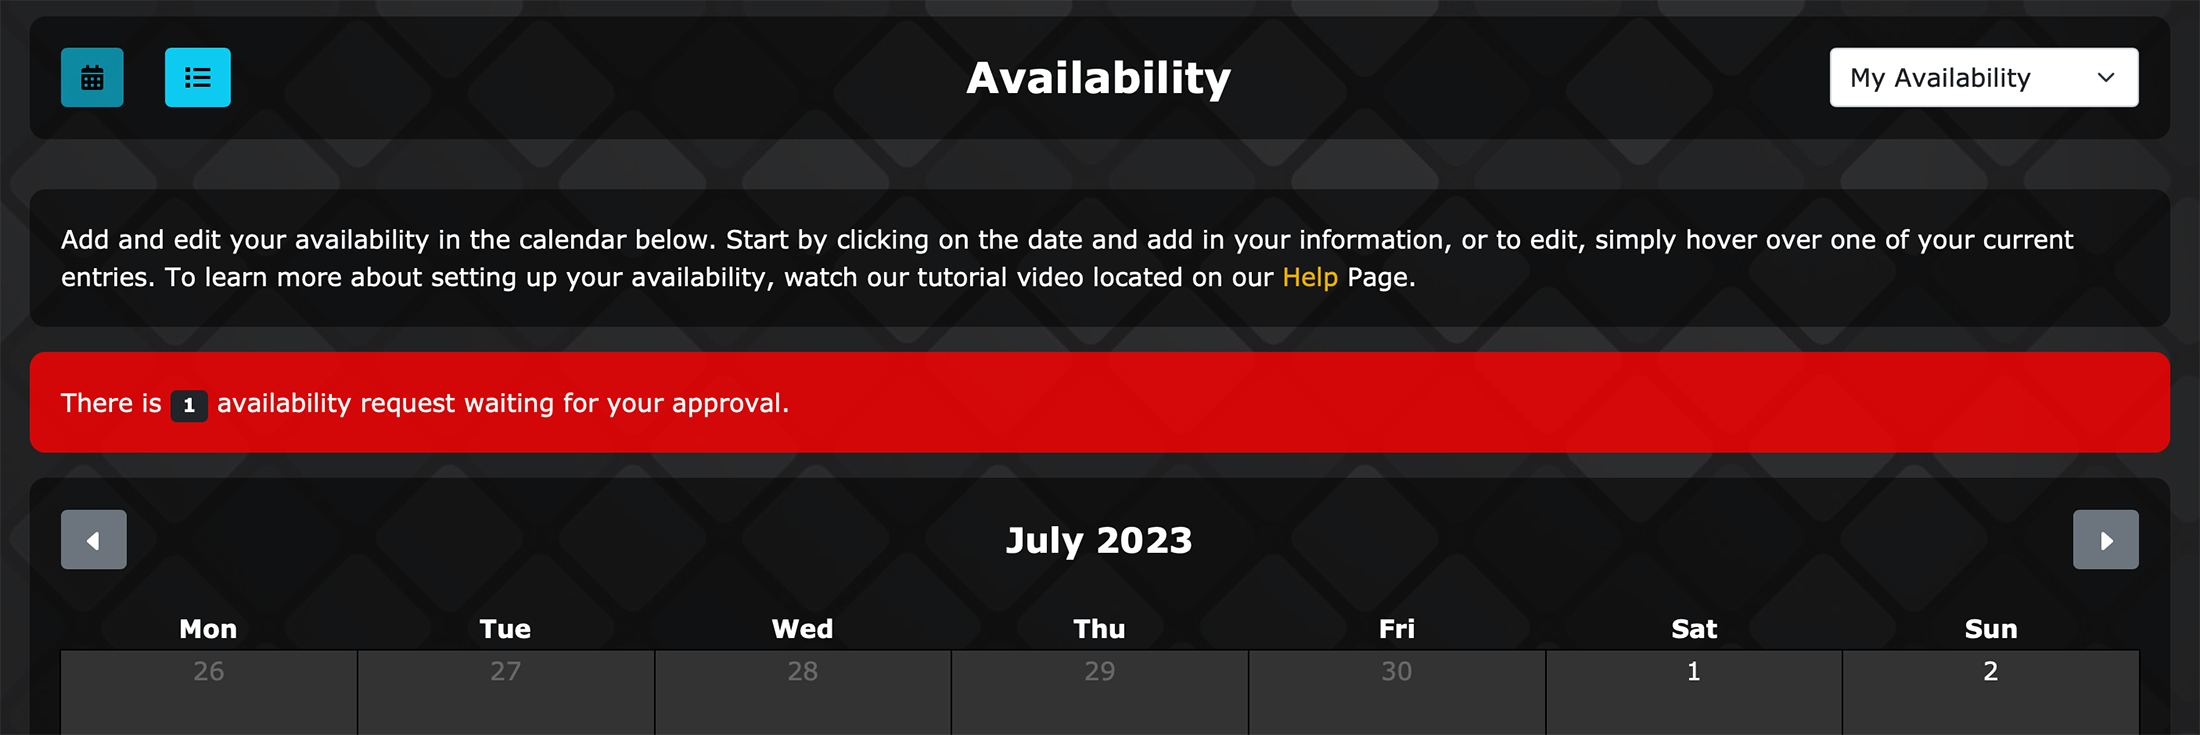 |
|
General Home Register Portal Features Contact About Us Help Articles |
Support Help Getting Started Video Tutorials Docs Updates Make A Suggestion |
Legal Terms of Use Privacy Policy |
Mobile Apps
|
Industries Hospitality Warehouses Fitness Studios Salons |
| © SchedCheck Inc. 2017 - 2026 | Connect With Us |

|
|
Navigation Home Register Features Contact About Us Help Articles |
|
Support Help Getting Started Video Tutorials Docs Updates Make A Suggestion |
|
Legal Terms of Service Privacy Policy |
|
Mobile Apps
|
|
Industries Hospitality Warehouses Fitness Studios Salons |
|
Connect With Us |
|
© SchedCheck Inc. 2017 - 2026 |